
SmartXPS
Create an account
Welcome to the Samson IT SmartXPS page. Before you can get started with linking SmartXPS to an application of your choice, you must create a user account. This page explains step by step how this works. If you still cannot find a solution, we will gladly help you with all your questions.
What do you need?
You need a Xelion VoIP telephone solution.
What steps do you need to take to create a user account?
Step 1: create an Api user in your Xelion solution
-
Go to your Xelion solution. The following page will be opened.
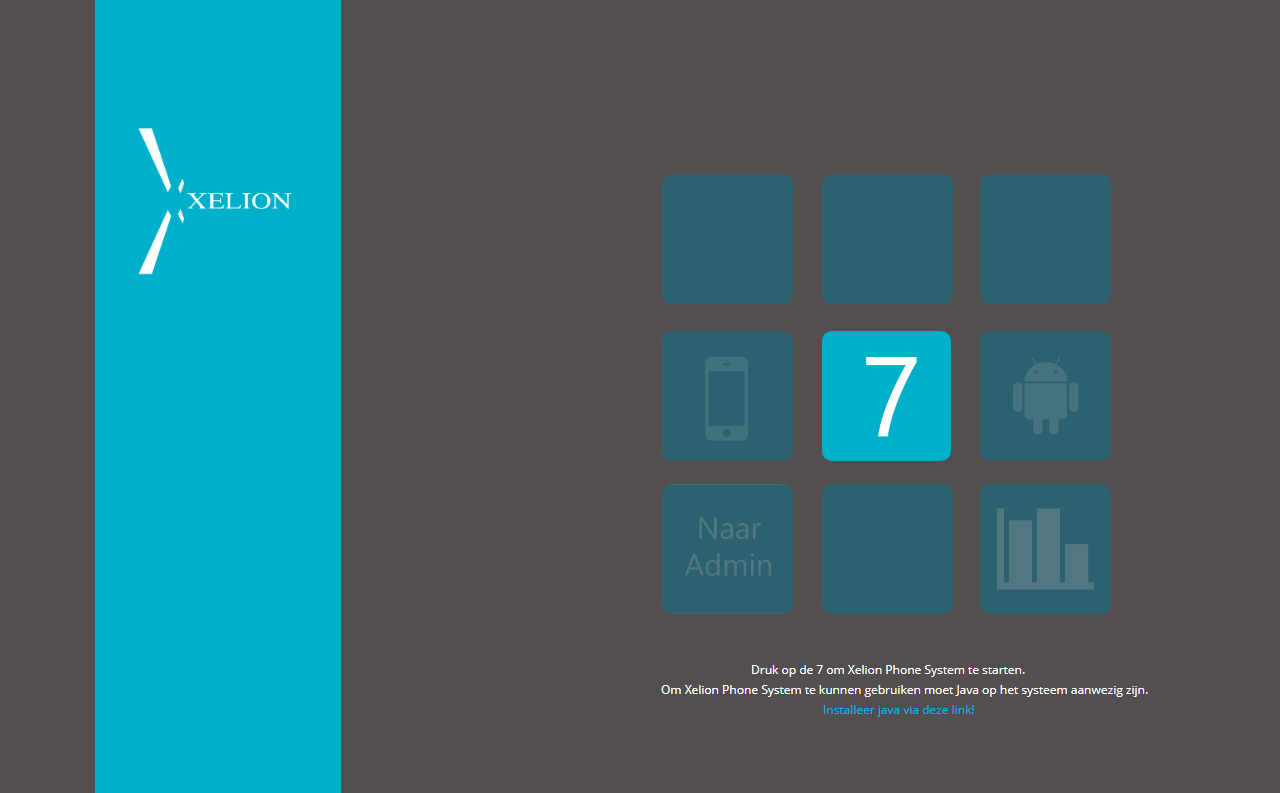
- Click on ‘To Admin’ at the bottom left and log in.
- Click Administration -> Users to add a new user.
- Then click New User in the top left. Enter the personal field and continue.
- Click on the User account tab and create a user account. The following page will now be opened.
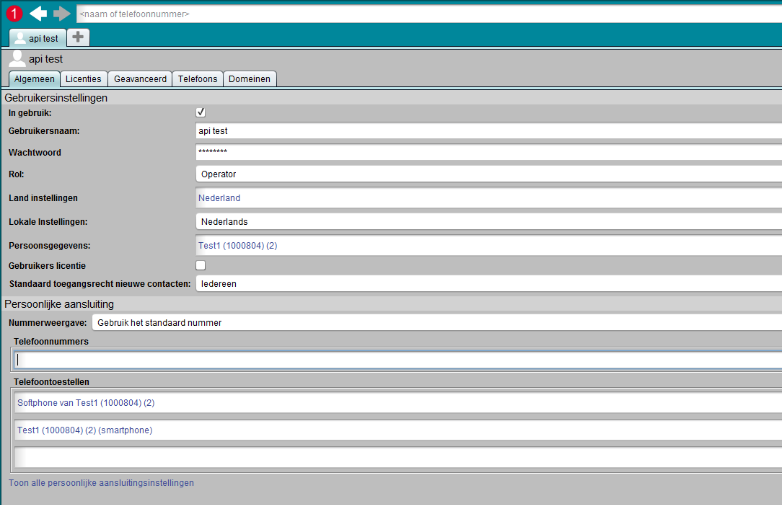
- Fill in the fields. Choose Operator for the role. It is not necessary to use a user license.
- Your api user has now been created. You will need this in step 2.
Step 2: Create a user account in SmartXPS
- Go to Smart XPS and click Register. The page below opens.
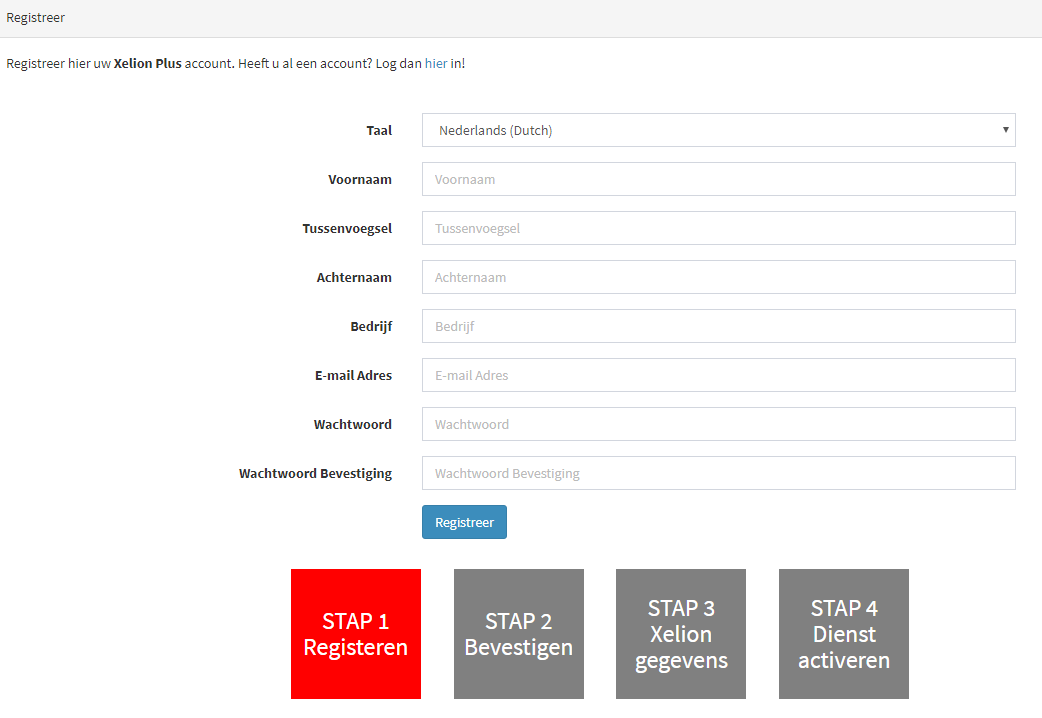
- Complete all fields and click Register. A confirmation email will now be sent to you.
- Open the confirmation email and click on the link. You can now log in.
- After you have logged in, the Xelion data page opens.
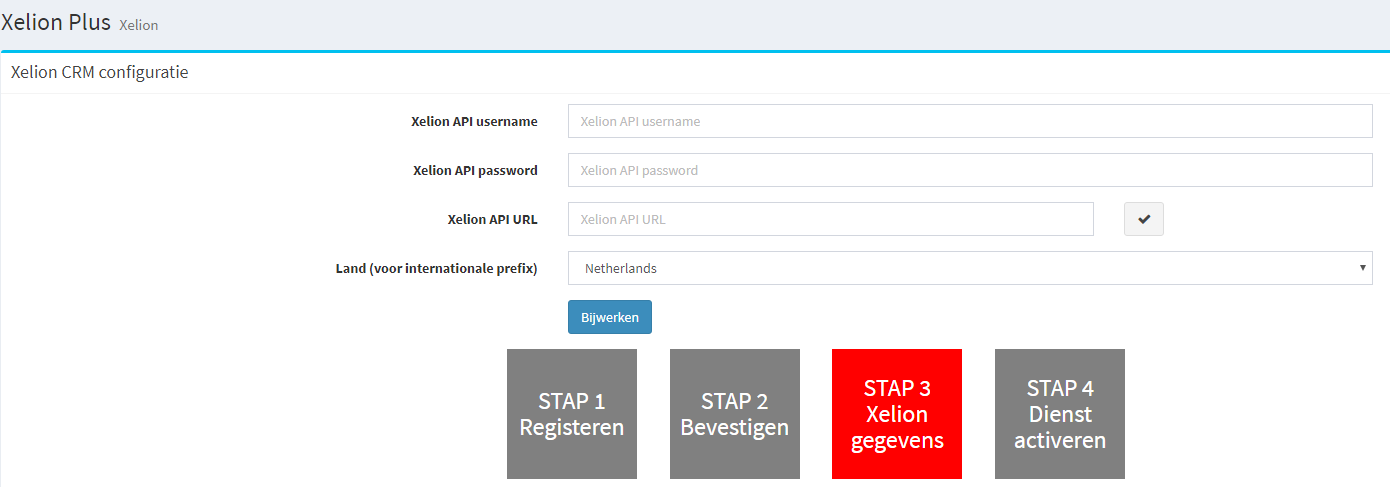
- Enter your API username and API password of the user you have just created in your Xelion solution.
- At the API URL, enter a URL that is structured as follows: https: // <host-name> / api / <version> / <tenant> /. An example of this is https://www.xelion.nl/api/v1/master/.
- To check if you have used the correct URL you can click on the check mark to the right of the Xelion API URL field.
- If you have completed all fields, click on Update. You can now use your SmartXPS account.
